Sync mode & JSON models
Let's learn AMSDAL by example.
Throughout this guide, we’ll walk you through the creation of a Travel application, which will allow us to build randomly a travel plan for the given persons, and also provide the ability to generate HTML report for upcoming journey.
Example
The sources of this example app are available on GitHub: Travel App Example
The deployed Demo Travel App is available here: Demo Travel App
Step 1 - Install AMSDAL
!pip install amsdal
!pip install amsdal_cli
For more detailed installation instructions, please refer to the Installation Guide.
Step 2 - Create an application
Let's create a new application using the amsdal-cli tool.
First of all we need to create an empty temp directory for our application. You can create it anywhere you want, we will use the tempfile module to create a temporary directory for our application:
import os
import tempfile
from pathlib import Path

notebook_dir = os.environ.setdefault('BASE_NOTEBOOK_DIR', os.getcwd())
print('Notebook dir:', notebook_dir)
temp_dir = tempfile.TemporaryDirectory()
working_directory = Path(temp_dir.name)

print('Workdir:', working_directory)
Notebook dir: /home/runner1/actions-runner/_work/amsdal_docs/amsdal_docs/docs/examples/cli/travel-app-demo
Workdir: /tmp/tmpdc21s1fq
Now, let's create a new application in the working_directory directory:
!amsdal new --models-format json TravelApp {working_directory}
You are using amsdal_models version 0.7.0, however version 0.7.1 is available.
You should consider upgrading via the 'pip install --upgrade amsdal_models'
command.
The application is successfully created in /tmp/tmpdc21s1fq/travel_app
Note, we are using the JSON format for models in this example.
It created a new directory travel_app with an empty AMSDAL application in our working directory.
Detailed information about the command and the files it has created can be found in the CLI reference.
We also need to install python packages from generated requirements.txt file:
%cd {working_directory}/travel_app

!pip install -r requirements.txt
import json
from pathlib import Path

# Pin application_uuid so deploys reuse the same namespace across notebook runs
cli_config_path = Path('.amsdal-cli')
cli_config = json.loads(cli_config_path.read_text())
cli_config['application_uuid'] = 'a58932e6f997427cb831ce9ef263e002'
cli_config_path.write_text(json.dumps(cli_config, indent=4))
print('Pinned application_uuid:', cli_config['application_uuid'])
Step 3 - Defining the models
The first of all, let’s design ERD (entity relationship diagram) for our models:


As we can see, the app will provide the ability to plan journeys, add to these journeys some people, and book properties.
Now we can define our models’ schemas. We will use AMSDAL CLI to generate these models. Go to the travel_app directory and run the following commands in the
terminal:
%cd {working_directory}/travel_app

!amsdal generate model Country -attrs "name:string code:string"
!amsdal generate model Person -attrs "first_name:string last_name:string dob:string"
!amsdal generate model Property -attrs "name:string type:string address:string free_parking:boolean free_wifi:boolean photos:has-many:File"
!amsdal generate model Booking -attrs "property:belongs-to:Property date:string nights:number:default=1"
!amsdal generate model Journey -attrs "start_date:string end_date:string country:belongs-to:Country persons:has-many:Person equipment:dict:string:number bookings:has-many:Booking"

print()
print('All models generated successfully!')
/tmp/tmpdc21s1fq/travel_app
You are using amsdal_models version 0.7.0, however version 0.7.1 is available.
You should consider upgrading via the 'pip install --upgrade amsdal_models'
command.
You are using amsdal_models version 0.7.0, however version 0.7.1 is available.
You should consider upgrading via the 'pip install --upgrade amsdal_models'
command.
You are using amsdal_models version 0.7.0, however version 0.7.1 is available.
You should consider upgrading via the 'pip install --upgrade amsdal_models'
command.
You are using amsdal_models version 0.7.0, however version 0.7.1 is available.
You should consider upgrading via the 'pip install --upgrade amsdal_models'
command.
You are using amsdal_models version 0.7.0, however version 0.7.1 is available.
You should consider upgrading via the 'pip install --upgrade amsdal_models'
command.
All models generated successfully!
Perfect, now, we have all defined models and are ready to run the local server to check it.
Note
You can find more details regarding the amsdal generate model command in
the CLI reference.
Step 4 - Run local server
AMSDAL CLI provides the ability to run a local server to test the application.
The first time you run the commands below, e.g. amsdal migrations new, you need to complete the registration process. Just follow the instructions in the terminal. See details here
When you will get credentials, set them below:
# put your credentials here
AMSDAL_ACCESS_KEY_ID = ''
AMSDAL_SECRET_ACCESS_KEY = ''

import os
os.environ["AMSDAL_ACCESS_KEY_ID"] = os.getenv("AMSDAL_ACCESS_KEY_ID") or AMSDAL_ACCESS_KEY_ID
os.environ["AMSDAL_SECRET_ACCESS_KEY"] = os.getenv("AMSDAL_SECRET_ACCESS_KEY") or  AMSDAL_SECRET_ACCESS_KEY

# Verify that the environment variables are set
print('AMSDAL_ACCESS_KEY_ID:', os.environ['AMSDAL_ACCESS_KEY_ID'])
print('AMSDAL_SECRET_ACCESS_KEY:', os.environ['AMSDAL_SECRET_ACCESS_KEY'])
AMSDAL_ACCESS_KEY_ID: 01e8f43ab5784a8b9be75bdaeabb2087
AMSDAL_SECRET_ACCESS_KEY: YzNjNGZkYjM0YTgyNGI0N2JmNDMxZWE0Y2JiNTUwZDk=
Let’s run it and check the result.
From the root directory of the travel_app run the following command in the terminal:
!amsdal migrations new
!amsdal migrations apply
You are using amsdal_models version 0.7.0, however version 0.7.1 is available.
You should consider upgrading via the 'pip install --upgrade amsdal_models'
command.
Migration created: 0000_initial.py
You are using amsdal_models version 0.7.0, however version 0.7.1 is available.
You should consider upgrading via the 'pip install --upgrade amsdal_models'
command.
classes:37: UserWarning: `_non_empty_keys_properties` overrides an existing Pydantic `@field_validator` decorator
classes:51: UserWarning: `_non_empty_keys_items` overrides an existing Pydantic `@field_validator` decorator
classes:76: UserWarning: `_non_empty_keys_properties` overrides an existing Pydantic `@field_validator` decorator
classes:238: UserWarning: `_non_empty_keys_data` overrides an existing Pydantic `@field_validator` decorator
classes:284: UserWarning: `_non_empty_keys_items` overrides an existing Pydantic `@field_validator` decorator
classes:151: UserWarning: `_non_empty_keys_equipment` overrides an existing Pydantic `@field_validator` decorator
Migrations applied
Core:
  - [x] 0000_initial.py
  - [x] 0001_create_class_file.py
  - [x] 0002_create_class_file.py
  - [x] 0003_update_class_file.py
  - [x] 0004_update_class_file.py
Contrib:
  - [x] amsdal.contrib.auth: 0000_initial.py
  - [x] amsdal.contrib.auth: 0001_add_mfa_support.py
  - [x] amsdal.contrib.auth: 0002_update_class_loginsession.py
  - [x] amsdal.contrib.auth: 0003_update_class_loginsession.py
  - [x] amsdal.contrib.frontend_configs: 0000_initial.py
  - [x] amsdal.contrib.frontend_configs: 0001_update_frontend_control_config.py
  - [x] amsdal.contrib.frontend_configs: 0002_add_button_and_invoke_actions.py
  - [x] amsdal.contrib.frontend_configs:
0003_create_class_frontendconfigdashboardelement.py
  - [x] amsdal.contrib.frontend_configs:
0004_update_class_frontendconfigdashboard.py
  - [x] amsdal.contrib.frontend_configs:
0005_update_class_frontendconfigcontrolaction.py
  - [x] amsdal.contrib.frontend_configs:
0006_add_on_row_click_to_dashboard_element.py
  - [x] amsdal.contrib.frontend_configs:
0007_add_table_actions_to_dashboard_element.py
App:
  - [x] 0000_initial.py
Note
These steps must be performed each time changes are made to models (creating, deleting, modifying existing models)
Now, let's run the local server using the following command:
amsdal serve
It will run the local API server, the Swagger documentation of it is available at this link: http://localhost:8080/docs
Also, we can use the AMSDAL Console - the web portal that is hosted on https://console.amsdal.com/.
An unauthorized user cannot log in and access the data, so you need to create a new user:
# put your user credentials here
AMSDAL_ADMIN_USER_EMAIL = 'admin@amsdal.com'
AMSDAL_ADMIN_USER_PASSWORD = 'DemoPassword1234!'
AUTH_JWT_KEY = 'my-secret-jwt-key'

import os
os.environ["AMSDAL_ADMIN_USER_EMAIL"] = os.getenv("AMSDAL_ADMIN_USER_EMAIL") or AMSDAL_ADMIN_USER_EMAIL
os.environ["AMSDAL_ADMIN_USER_PASSWORD"] = os.getenv("AMSDAL_ADMIN_USER_PASSWORD") or AMSDAL_ADMIN_USER_PASSWORD
os.environ["AUTH_JWT_KEY"] = os.getenv("AUTH_JWT_KEY") or AUTH_JWT_KEY
Note, that the AUTH_JWT_KEY is a secret key for JWT token generation. It should be a long and secure string.
Now you can restart the server and try to log in.
Login:
admin@amsdal.com
Password:DemoPassword1234!
API Url:http://localhost:8080
Now, let’s fill our database with some data.
Step 5 - Fixtures
We will use fixtures in order to fill our database. Let’s create fixtures for our Country model:
from pathlib import Path

fixture_file = Path('./src/fixtures/country.json')
fixture_file.parent.mkdir(parents=True, exist_ok=True)
fixture_file.write_text('''{
    "Country": [
      {
        "external_id": "us",
        "name": "United States",
        "code": "US"
      },
      {
        "external_id": "gb",
        "name": "United Kingdom",
        "code": "GB"
      },
      {
        "external_id": "de",
        "name": "Germany",
        "code": "DE"
      }
    ]
}
''')
321
As you can see the name and the code are properties of our Country model. Although, we also have the external_id
which is just a unique key that you can use in the fixtures as a reference ID to these records. It can be any unique
string.
Now, let’s restart our local server, stop and start again - amsdal serve. Check results:
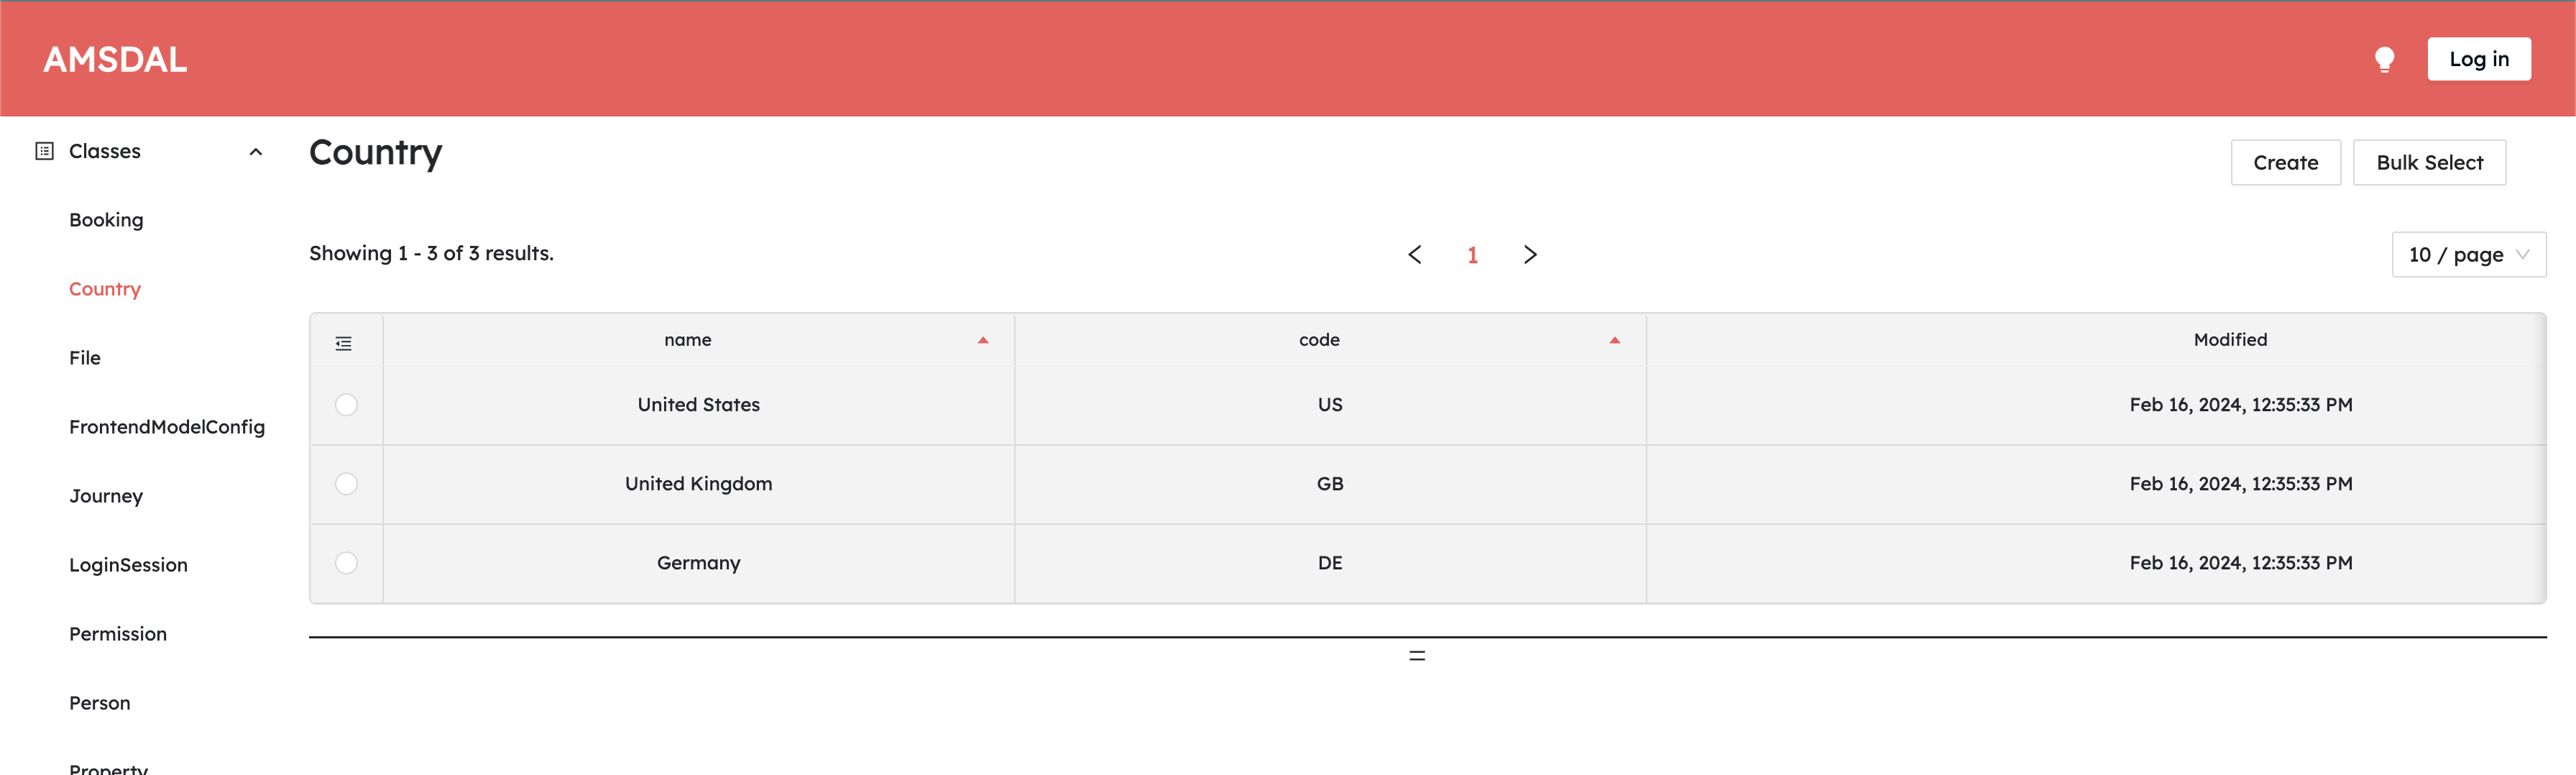
Go to https://console.amsdal.com/Country and you will see there are our three countries:
Go to http://localhost:8080/docs and
scroll down to Object List API. Click on Try it out and put Country into class_name field, hit an Execute.
You will get JSON response with your countries that were created from fixtures.
Let’s do the same for the Property model:
fixture_file = Path('./src/fixtures/properties.json')
fixture_file.write_text('''{
    "Property": [
      {
        "external_id": "7fe17f0a-2c63-4076-b0fb-0a75022c489f",
        "name": "Freehand Los Angeles",
        "type": "Hotel",
        "address": "416 W 8th St",
        "free_parking": true,
        "free_wifi": true,
        "photos": [
          "Property/1.png",
          "Property/2.png",
          "Property/3.png"
        ]
      },
      {
        "external_id": "098e6218-75bf-4728-a844-196884ed6a90",
        "name": "Murray Hill East Suites",
        "type": "Apartment",
        "address": "149 E 39th St",
        "free_parking": false,
        "free_wifi": true,
        "photos": [
          "Property/4.png",
          "Property/5.png"
        ]
      },
      {
        "external_id": "355d1b05-182c-48ca-b792-aba237dafa9b",
        "name": "Hafenhaus Gager",
        "type": "Country House",
        "address": "Hauptstraße 1",
        "free_parking": true,
        "free_wifi": false,
        "photos": [
          "Property/6.png",
          "Property/7.png"
        ]
      }
    ]
}''')
1034
As you can see, these fixtures include the photos. For example, the "Property/6.jpeg" means that it should use the
photo located in the ./src/fixtures/files/Property/ directory. So we need to put photos there:
from pathlib import Path
import shutil

source_dir = Path(notebook_dir) / "photos"
destination_dir = Path('./src/fixtures/files/Property')

# Create destination directory if it doesn't exist
destination_dir.mkdir(parents=True, exist_ok=True)

# Copy files from source to destination
for file_path in source_dir.iterdir():
    if file_path.is_file():
        shutil.copy(file_path, destination_dir)
Now, let’s re-run our local API server and see the results by the following link:
https://console.amsdal.com/Property
Note
📎 If you want to know more about the fixtures, see the following documentation: Fixtures
Tip
If you check how the response is returned via API
Objects list for Property class name, you will
notice that binary data of images are returned in base64 format prefixed with data:binary;base64,. It's because
JSON does not support binary data. It means, if you want to create objects with binary properties via API you need
to encode the binary value to base64 and send it in the same format: data:binary;base64, YOUR-BASE64-DATA.
Now, let’s add some business logic, for example, we don’t want to allow to create of a journey with a non-adult person ( a person aged less than 18).
Step 6 - Adding hooks
Hooks allow you to add custom logic to the model's lifecycle. For example, you can add a hook that will be executed before the model is saved to the database.
We will use the pre_create hook on the Journey model in order to achieve this.
Run the following command:
!amsdal generate hook --model Journey pre_create
You are using amsdal_models version 0.7.0, however version 0.7.1 is available.
You should consider upgrading via the 'pip install --upgrade amsdal_models'
command.
It will create the following file: src/models/journey/hooks/pre_create.py
Let’s edit it and add the following code:
hook_file = Path('./src/models/journey/hooks/pre_create.py')
hook_file.write_text('''
from datetime import datetime
from datetime import date

from amsdal import Reference
from amsdal import ReferenceLoader


def pre_create(self) -> None:
    self.validate_persons_age()


def validate_persons_age(self) -> None:
    from models.person import Person

    for index, person_reference in enumerate(self.persons or []):
        person: Person

        if isinstance(person_reference, Person):
            person = person_reference
        elif isinstance(person_reference, Reference):
            person = ReferenceLoader(person_reference).load_reference()
        else:
            person = ReferenceLoader(Reference(**person_reference)).load_reference()

        try:
            birthdate = datetime.strptime(person.dob, "%Y-%m-%d")
        except (TypeError, ValueError):
            continue

        today = date.today()
        age = today.year - birthdate.year - ((today.month, today.day) < (birthdate.month, birthdate.day))

        if age < 18:
            raise ValueError(f"{person.first_name} {person.last_name}: Age must be 18 or older")
''')
1064
Note, we will check the age if only this is a creation, not updating. Also, we assume the DOB is stored in YYYY-MM-DD
format.
The important thing here is that all related objects can be passed either as an instance of an object or a reference. In
our case, the list of people is the list of references. Therefore, in order to get the actual object by reference
we need to construct the Reference object and execute load_reference() method.
We can handle all the cases by the following code:
if isinstance(person_reference, Person):
    person = person_reference
elif isinstance(person_reference, Reference):
    person = ReferenceLoader(person_reference).load_reference()
else:
    person = ReferenceLoader(Reference(**person_reference)).load_reference()
Now, the person is an instance of the Person model with corresponding properties and values.
Note
📎 If you want to know more about references, see the following documentation: References
Also, note how we raise the validation errors, you can raise built-in ValueError exception.
Since we have made changes to the models we need to create and apply new migrations. Run the following commands:
!amsdal migrations new
!amsdal migrations apply
You are using amsdal_models version 0.7.0, however version 0.7.1 is available.
You should consider upgrading via the 'pip install --upgrade amsdal_models'
command.
Migration created: 0001_update_class_journey.py
You are using amsdal_models version 0.7.0, however version 0.7.1 is available.
You should consider upgrading via the 'pip install --upgrade amsdal_models'
command.
classes:37: UserWarning: `_non_empty_keys_properties` overrides an existing Pydantic `@field_validator` decorator
classes:51: UserWarning: `_non_empty_keys_items` overrides an existing Pydantic `@field_validator` decorator
classes:76: UserWarning: `_non_empty_keys_properties` overrides an existing Pydantic `@field_validator` decorator
classes:87: UserWarning: `_non_empty_keys_data` overrides an existing Pydantic `@field_validator` decorator
classes:62: UserWarning: `_non_empty_keys_items` overrides an existing Pydantic `@field_validator` decorator
classes:150: UserWarning: `_non_empty_keys_equipment` overrides an existing Pydantic `@field_validator` decorator
classes:41: UserWarning: `_non_empty_keys_equipment` overrides an existing Pydantic `@field_validator` decorator
Migrations applied
App:
  - [x] 0001_update_class_journey.py
Let’s restart our API server amsdal serve and create a Person with an age less than 18 and try to add this person to a
journey.
- Go to https://console.amsdal.com/Person and click on
Createbutton. - Fill the form in, the first name, the last name, and put DOB so our person will have an age less than 18, in format
YYYY-MM-DD - And click on the
SubmitSo, you should see something like: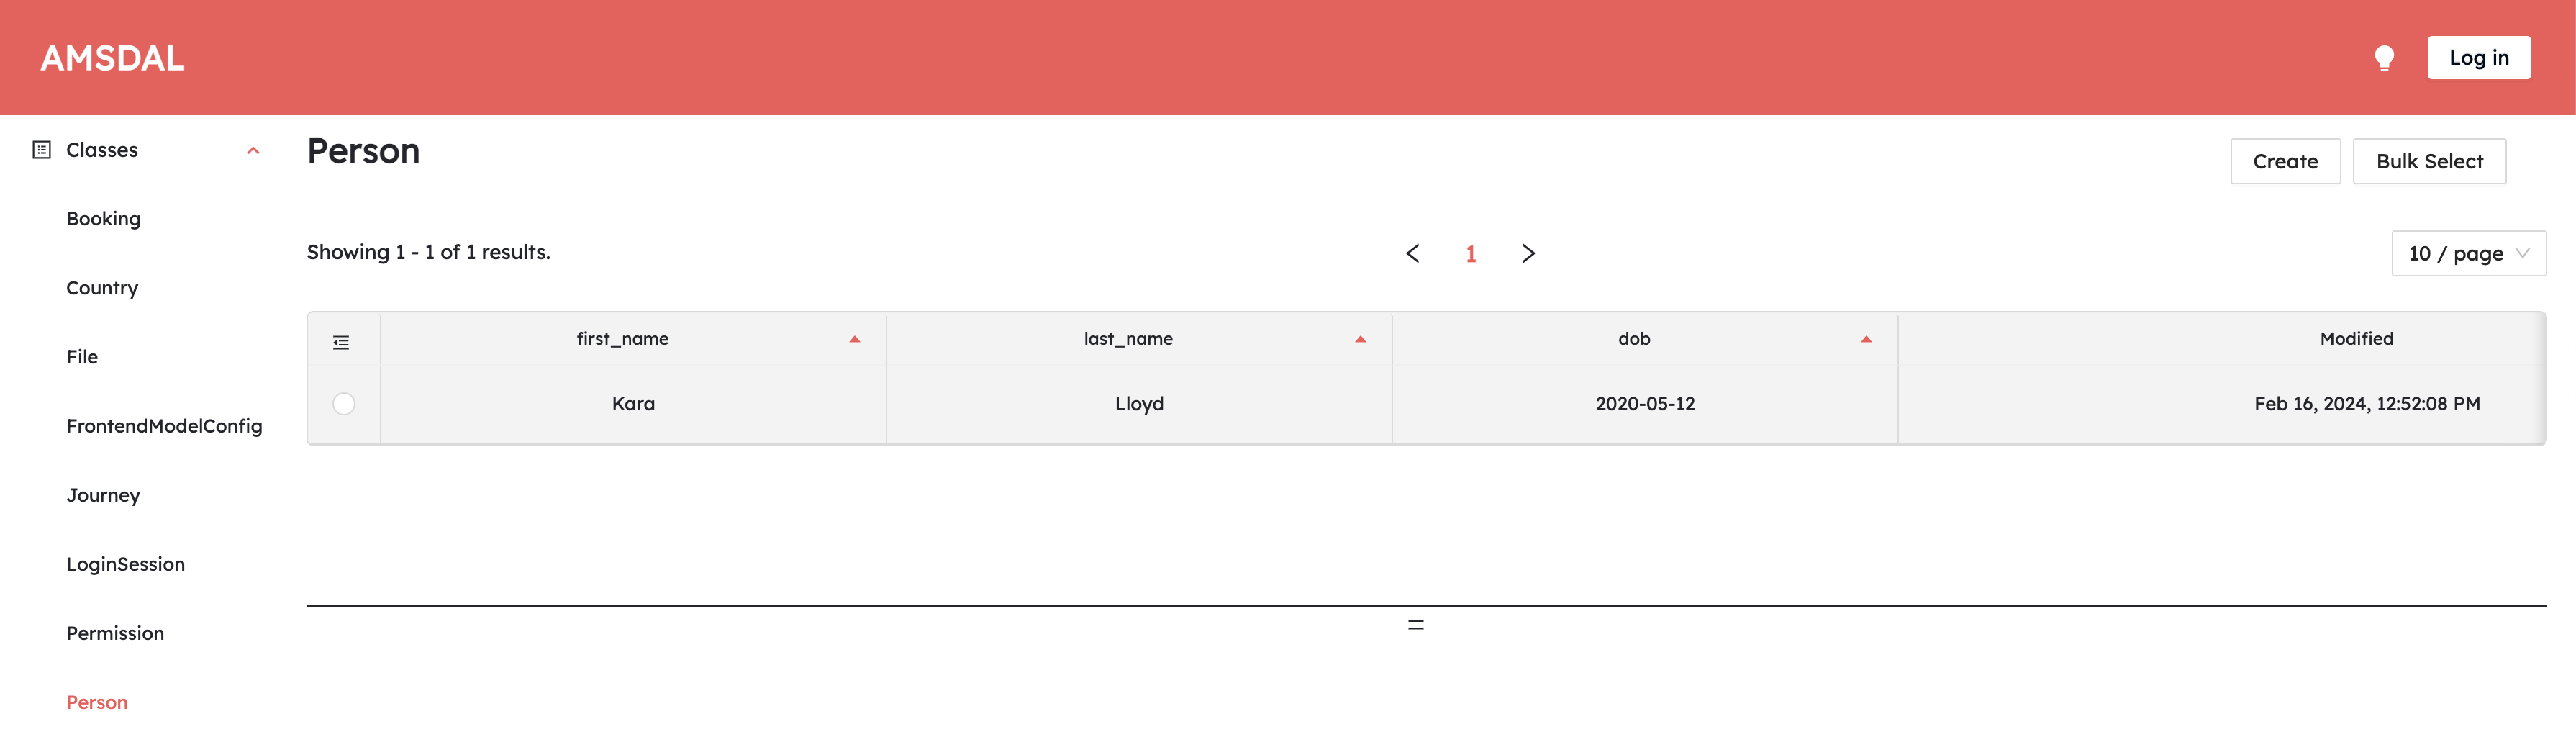
- Go to http://localhost:8000/docs and scroll
down to
Object CreateAPI, click onTry it out. - Fill the
class_namefield withPerson - Put the following JSON into request body:
You should get
{ "first_name": "Kara", "last_name": "Lloyd", "dob": "2020-05-12" }201status code and the created person in response body, something like:The important here is the value under{ "first_name": "Kara", "last_name": "Lloyd", "dob": "2020-05-12", "_metadata": { "address": { "resource": "sqlite_state", "class_name": "Person", "class_version": "a7087c0f82c0465f8223977c37ef4272", "object_id": "3c1eb6f90c8d4a4a870d47c3dafdb207", "object_version": "42bbc479be054f4e874bbfcc78771e52" }, "class_schema_reference": { "ref": { "resource": "sqlite_state", "class_name": "ClassObject", "class_version": "fd6b5582025146209b675e35455dd32f", "object_id": "Person", "object_version": "a7087c0f82c0465f8223977c37ef4272" } }, ... }, ... }_metadata.addresskey. It's the address of the object that we can use as a reference. We will use it just in a moment.
Now let’s try to add this person to a new journey:
- Go to https://console.amsdal.com/Journey and click on the
Createbutton - Fill in the start date and the end date in the format
YYYY-MM-DD, e.g. 2023-08-01 and 2023-08-10, select any country and add our person. You should see something like: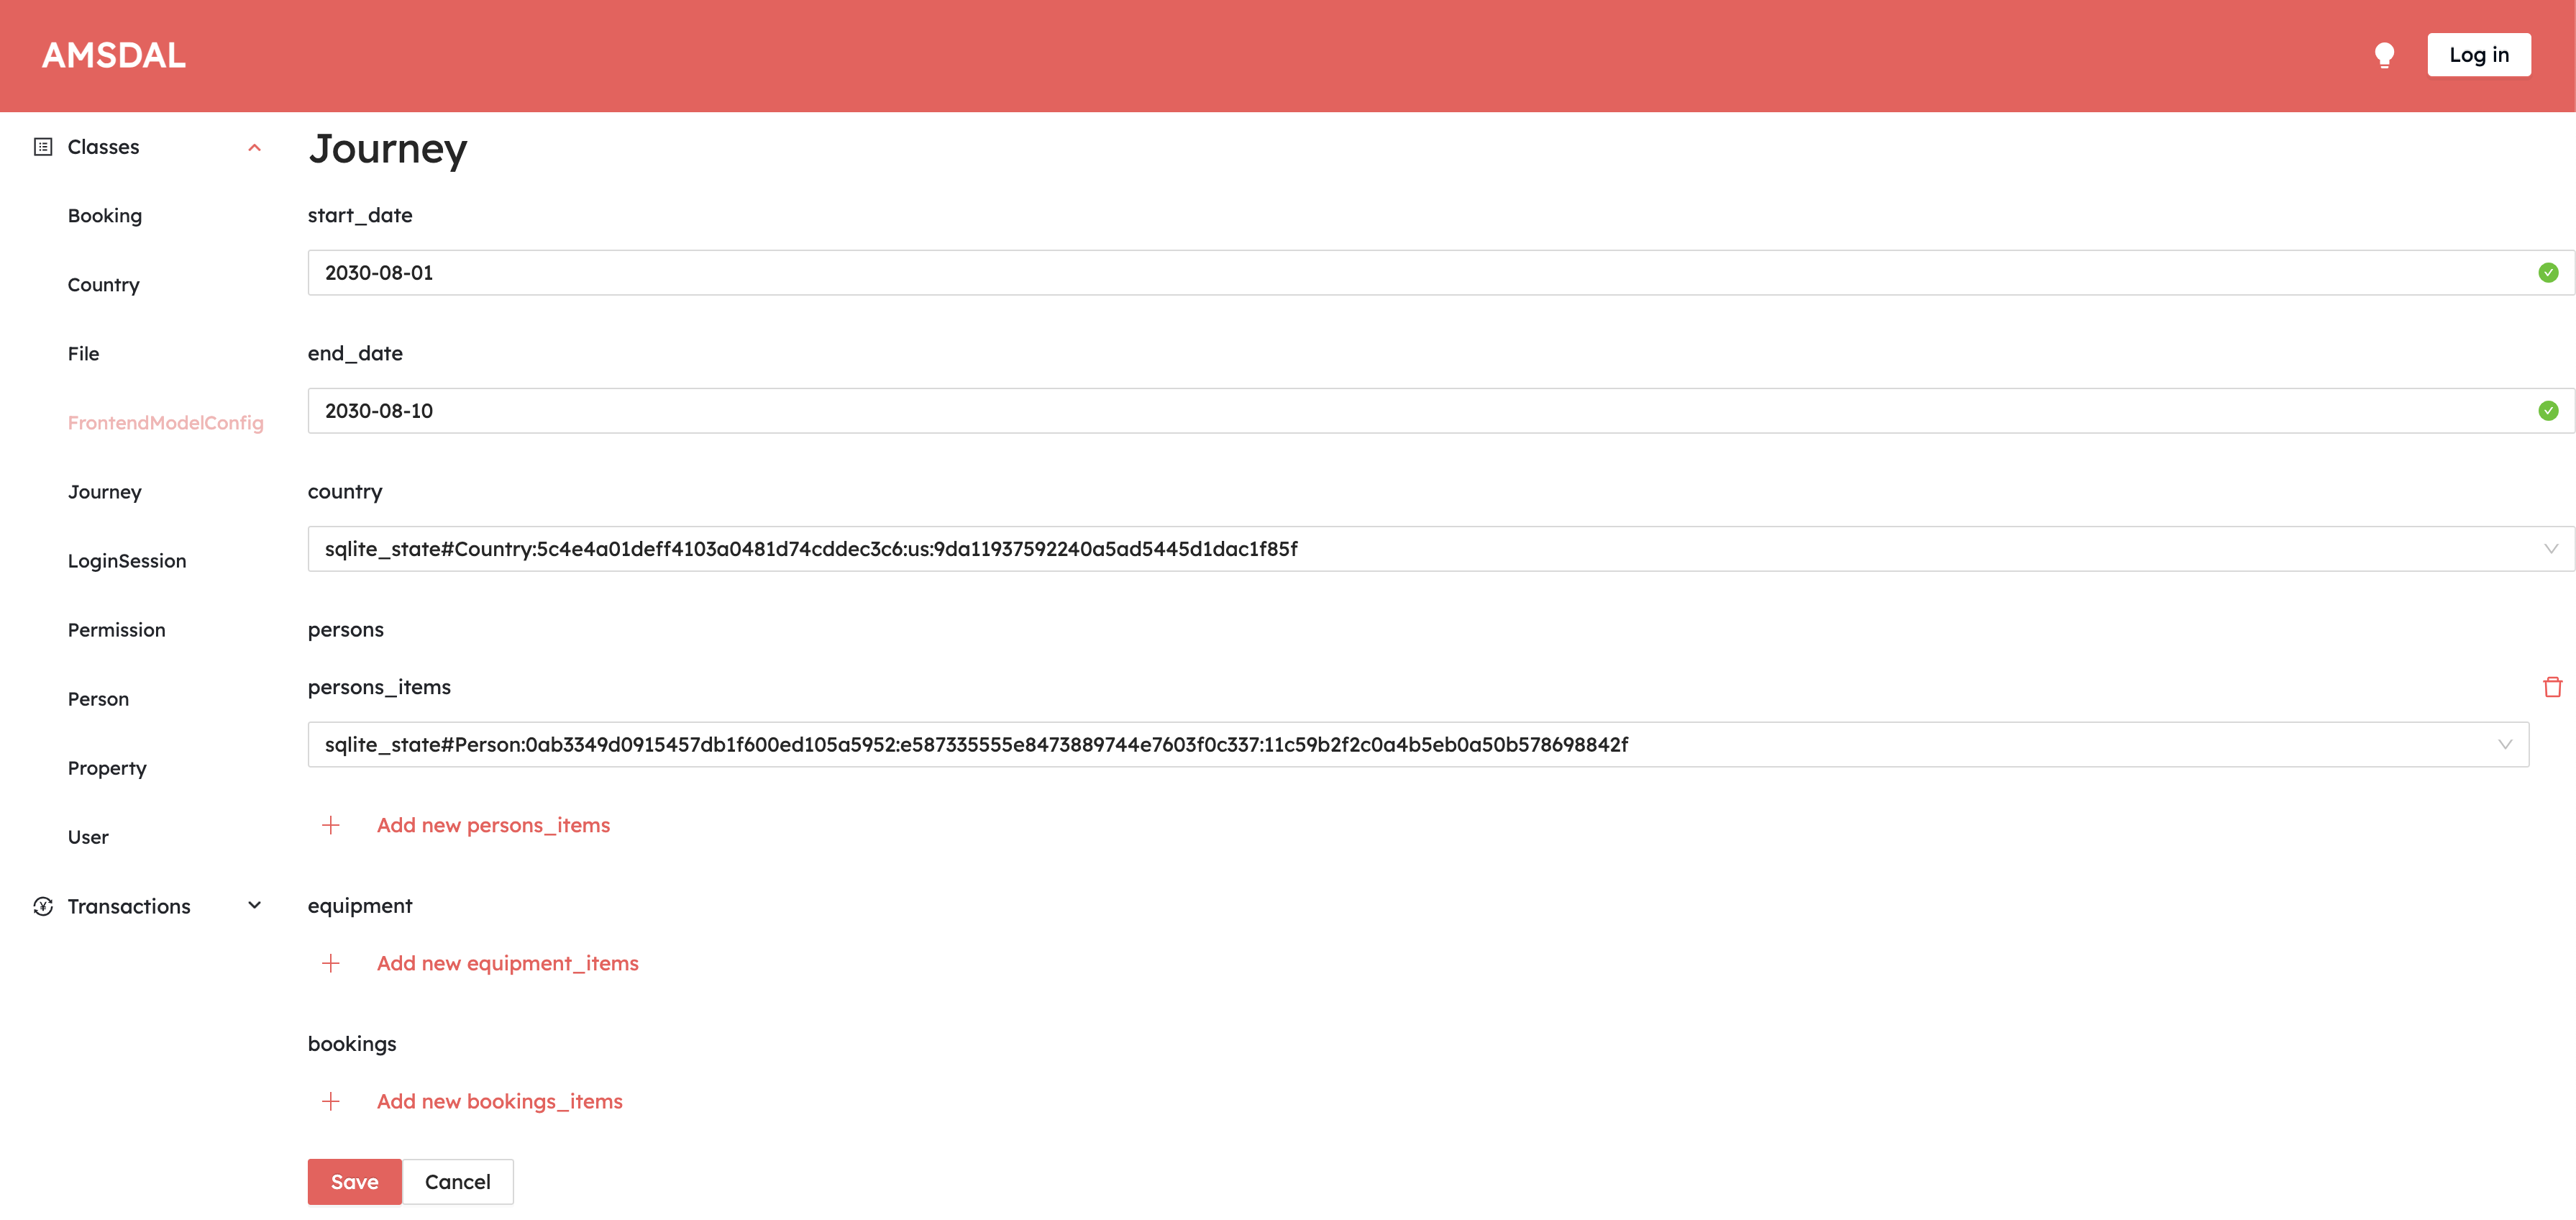 Now, click on
 Submit, you will see the error message: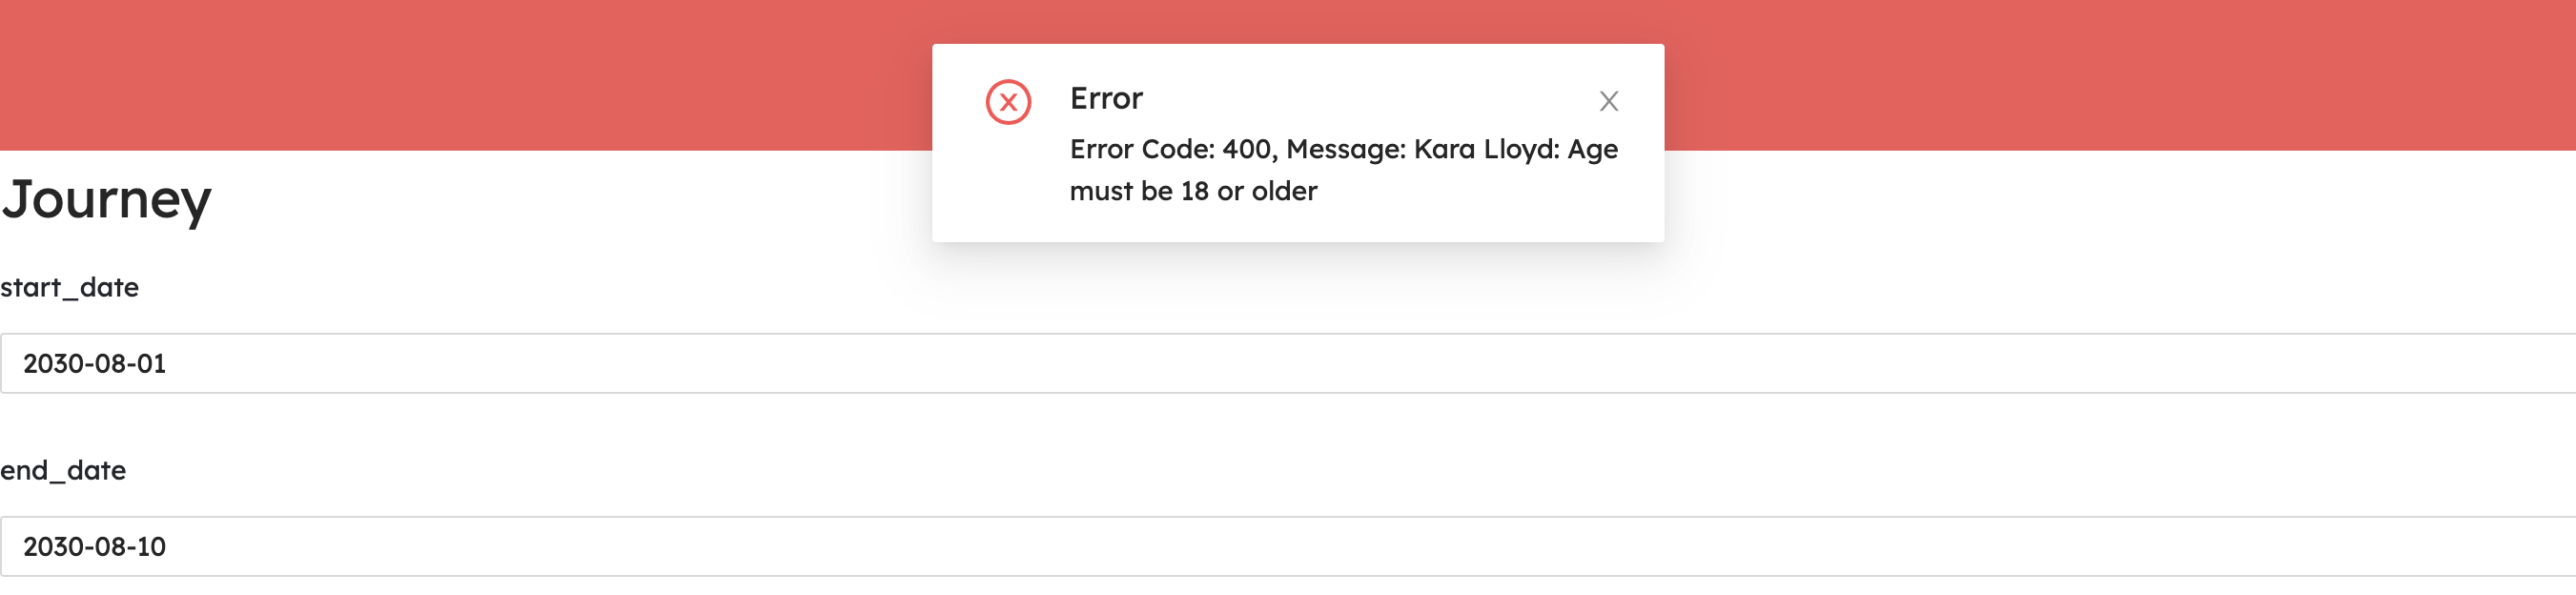
- Got to http://localhost:8000/docs and scroll
down to
Object CreateAPI, click onTry it out. - Fill the
class_namefield withJourney - Put the following JSON as a request body:
{ "start_date": "2030-08-01", "end_date": "2030-08-10", "country": {"ref": COUNTRY_ADDRESS}, "persons": [{"ref": PERSON_ADDRESS}] } - Before submitting, we need to replace
COUNTRY_ADDRESSandPERSON_ADDRESSwith actual addresses. ThePERSON_ADDRESSyou can get from previous request. TheCOUNTRY_ADDRESSone - from the response of Object List API, just pick_metadata.addressof any country and put it here as it is. So you should have something like this:{ "start_date": "2030-08-01", "end_date": "2030-08-10", "country": { "ref": { "resource": "sqlite_state", "class_name": "Country", "class_version": "51c77e43822441709a4d4b45f2f7c51b", "object_id": "us", "object_version": "a6044862269a48ce9a05627b850ec472" } }, "persons": [ { "ref": { "resource": "sqlite_state", "class_name": "Person", "class_version": "af7ef113a01a4240856154ef2dacf4db", "object_id": "230b2021fa0646a0892b5ee27afe8996", "object_version": "31918790b0474aefa26074d1ff7efd8b" } } ] } - Click on
Executeand you will get400status code and the following JSON response:{ "detail": "Kara Lloyd: Age must be 18 or older", "control": ... }
Perfect!
Note
📎 If you want to know more about all available hooks, see the following documentation: Generate Hooks
You might notice how the records are displayed in select fields on the AMSDAL Console:
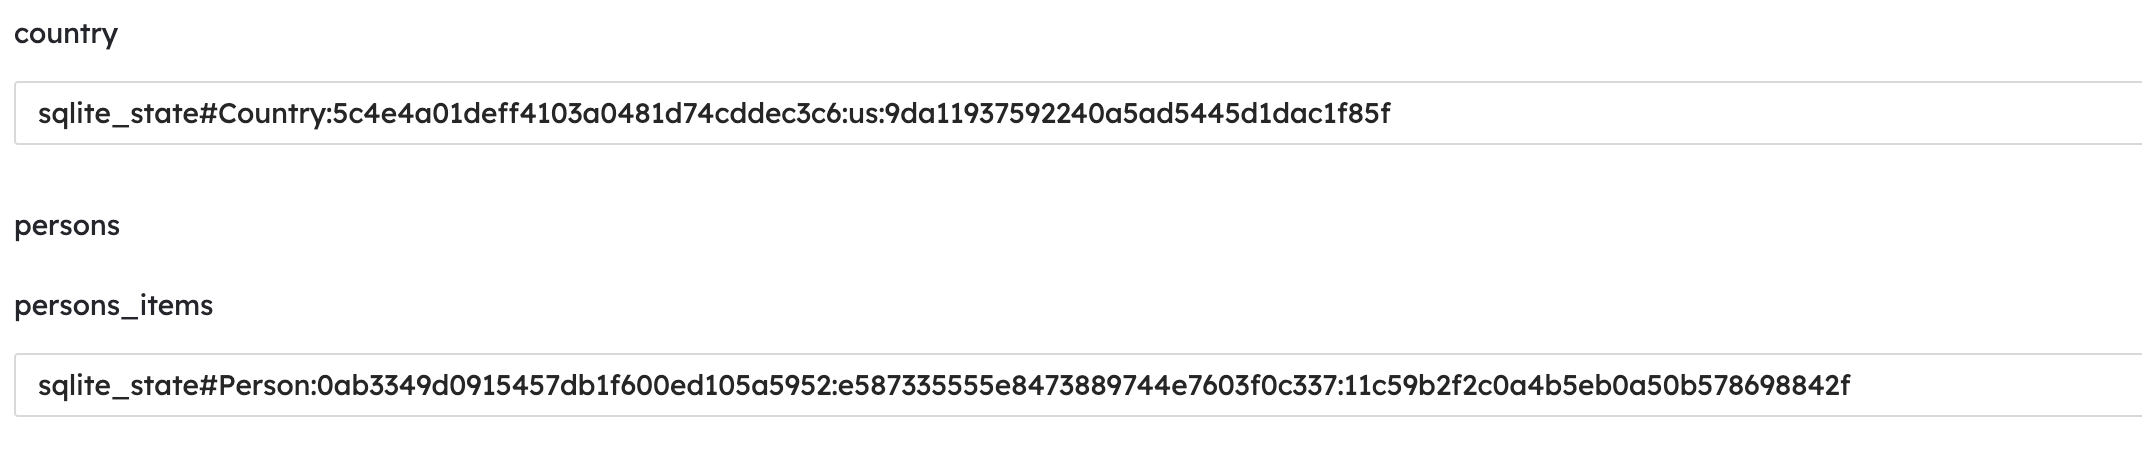
It’s not quite informative, so let’s improve it.
Step 7 - Creating a display name modifier
The modifier, it’s a predefined method that allows you to override some specific built-in methods or properties of your end models. Run the following commands in order to generate the blueprints of the display name modifiers for our models:
!amsdal generate modifier --model Person display_name
!amsdal generate modifier --model Country display_name
You are using amsdal_models version 0.7.0, however version 0.7.1 is available.
You should consider upgrading via the 'pip install --upgrade amsdal_models'
command.
You are using amsdal_models version 0.7.0, however version 0.7.1 is available.
You should consider upgrading via the 'pip install --upgrade amsdal_models'
command.
it will create modifiers/display_name.py files in each of our specified models. Let’s open ./src/models/country/modifiers/display_name.py file for the country
model and change it to the following:
country_display = Path('./src/models/country/modifiers/display_name.py')
country_display.write_text('''
@property
def display_name(self) -> str:
    return self.name
''')
63
The self is our instance of the Country model, so we can access any of the fields of this model. In our case, it’s
enough to just return the country name and show it in UI.
Now, let’s change src/models/person/modifiers/display_name.py to the following:
display_name = Path('./src/models/person/modifiers/display_name.py')
display_name.write_text('''
@property
def display_name(self) -> str:
    from datetime import datetime
    from datetime import date

    today = date.today()

    try:
        birthdate = datetime.strptime(self.dob, "%Y-%m-%d")
    except (TypeError, ValueError):
        age = "N/A"
    else:
        age = today.year - birthdate.year - ((today.month, today.day) < (birthdate.month, birthdate.day))

    return f"{self.first_name} {self.last_name} ({age} years old)"
''')
442
As you can see we access two fields of the Person model and combine them to the string using Python’s f string
functionality to have the full name of a person.
Let's not forget to make the migrations:
!amsdal migrations new
!amsdal migrations apply
You are using amsdal_models version 0.7.0, however version 0.7.1 is available.
You should consider upgrading via the 'pip install --upgrade amsdal_models'
command.
Migration created: 0002_update_class_country.py
You are using amsdal_models version 0.7.0, however version 0.7.1 is available.
You should consider upgrading via the 'pip install --upgrade amsdal_models'
command.
classes:37: UserWarning: `_non_empty_keys_properties` overrides an existing Pydantic `@field_validator` decorator
classes:51: UserWarning: `_non_empty_keys_items` overrides an existing Pydantic `@field_validator` decorator
classes:76: UserWarning: `_non_empty_keys_properties` overrides an existing Pydantic `@field_validator` decorator
classes:273: UserWarning: `_non_empty_keys_data` overrides an existing Pydantic `@field_validator` decorator
classes:284: UserWarning: `_non_empty_keys_items` overrides an existing Pydantic `@field_validator` decorator
classes:150: UserWarning: `_non_empty_keys_equipment` overrides an existing Pydantic `@field_validator` decorator
classes:41: UserWarning: `_non_empty_keys_equipment` overrides an existing Pydantic `@field_validator` decorator
Migrations applied
App:
  - [x] 0002_update_class_country.py
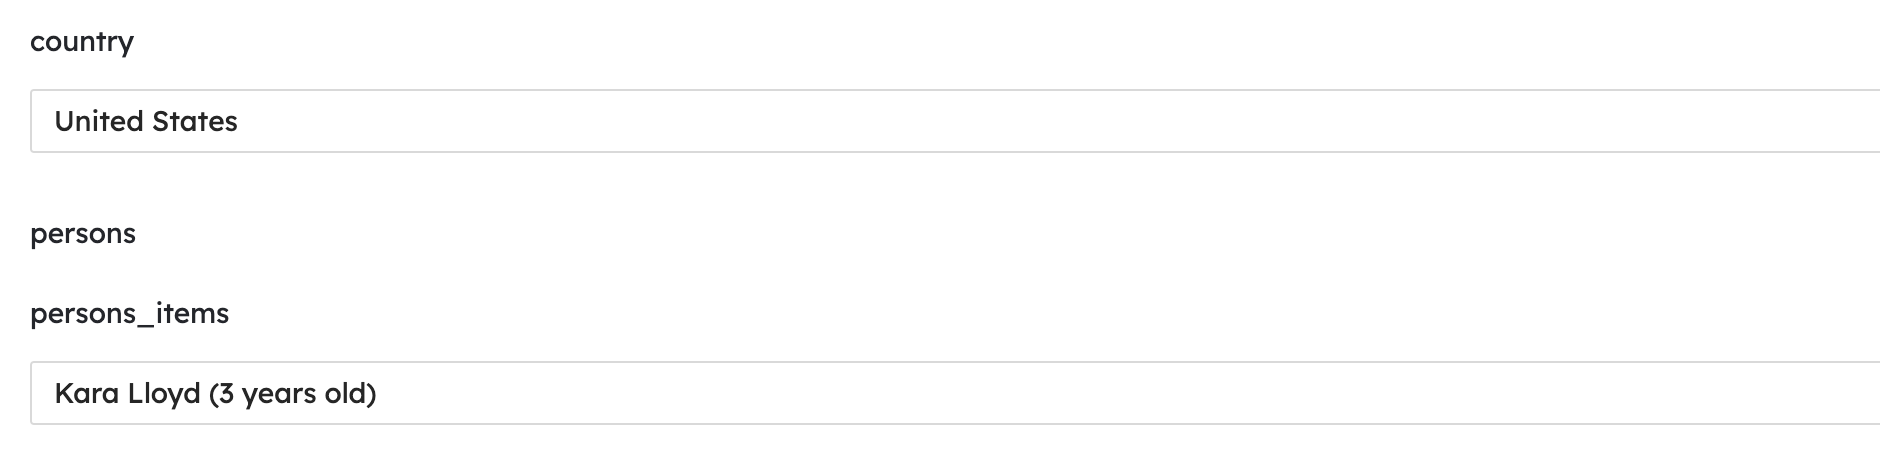
Now, if you will restart the server:
And during creation a journey you will see something like this:
And using the Object List API for these models, in JSON response you will get an extra display_name field:
  ...
  {
    "name": "United States",
    "code": "US",
    "display_name": "United States",
    ...,
  },
  ...
Perfect!
Note
📎 If you want to know more about all available modifiers, see the following documentation: Generate Modifiers
You might notice that we already had similar functionality for calculating the age. We did this in the pre_init hook.
Let’s keep following the DRY (Don't repeat yourself) principle and move this functionality to the custom property of the
Person model.
Step 8 - Creating a custom property
Let's run the following command to generate the blueprint of the custom property for the Person model:
!amsdal generate property --model Person age
You are using amsdal_models version 0.7.0, however version 0.7.1 is available.
You should consider upgrading via the 'pip install --upgrade amsdal_models'
command.
It will create src/models/person/properties/age.py file. Let's change it to the following:
prop = Path('./src/models/journey/hooks/pre_create.py')
prop.write_text('''
@property
def age(self):
    from datetime import datetime
    from datetime import date

    today = date.today()

    try:
        birthdate = datetime.strptime(self.dob, "%Y-%m-%d")
    except (TypeError, ValueError):
        return "N/A"
    else:
        return today.year - birthdate.year - ((today.month, today.day) < (birthdate.month, birthdate.day))
''')
360
Now, we can use this property in the pre_create hook for Journey model. Let's adjust the src/models/journey/hooks/pre_create.py
to the following:
hook_file = Path('./src/models/journey/hooks/pre_create.py')
hook_file.write_text('''
from amsdal import Reference
from amsdal import ReferenceLoader


def pre_create(self) -> None:
    self.validate_persons_age()


def validate_persons_age(self) -> None:
    from models.person import Person

    for index, person_reference in enumerate(self.persons or []):
        person: Person
        if isinstance(person_reference, Person):
            person = person_reference
        elif isinstance(person_reference, Reference):
            person = ReferenceLoader(person_reference).load_reference()
        else:
            person = ReferenceLoader(Reference(**person_reference)).load_reference()

        if person.age == "N/A":
            raise ValueError("Invalid DOB format. Please use YYYY-MM-DD")

        if person.age < 18:
            raise ValueError(
                f"{person.first_name} {person.last_name}: Age must be 18 or older"
            )
''')
873
It’s much clear now, is it?
Let’s do the same for the display_name modifier of the Person model. Open src/models/person/modifiers/display_name.py
and change it to the following:
display_name = Path('./src/models/person/modifiers/display_name.py')
display_name.write_text('''
@property
def display_name(self) -> str:
    return f"{self.first_name} {self.last_name} ({self.age} years old)"
''')
114
Don't forget to create migrations:
!amsdal migrations new
!amsdal migrations apply
You are using amsdal_models version 0.7.0, however version 0.7.1 is available.
You should consider upgrading via the 'pip install --upgrade amsdal_models'
command.
Migration created: 0003_update_class_person.py
You are using amsdal_models version 0.7.0, however version 0.7.1 is available.
You should consider upgrading via the 'pip install --upgrade amsdal_models'
command.
classes:37: UserWarning: `_non_empty_keys_properties` overrides an existing Pydantic `@field_validator` decorator
classes:51: UserWarning: `_non_empty_keys_items` overrides an existing Pydantic `@field_validator` decorator
classes:76: UserWarning: `_non_empty_keys_properties` overrides an existing Pydantic `@field_validator` decorator
classes:238: UserWarning: `_non_empty_keys_data` overrides an existing Pydantic `@field_validator` decorator
classes:284: UserWarning: `_non_empty_keys_items` overrides an existing Pydantic `@field_validator` decorator
classes:137: UserWarning: `_non_empty_keys_equipment` overrides an existing Pydantic `@field_validator` decorator
classes:41: UserWarning: `_non_empty_keys_equipment` overrides an existing Pydantic `@field_validator` decorator
classes:70: UserWarning: `_non_empty_keys_equipment` overrides an existing Pydantic `@field_validator` decorator
Migrations applied
App:
  - [x] 0003_update_class_person.py
And now try to restart the server and check it out.
Perfect! Our custom properties will now be displayed as a separate column, for example for Person we now have an “Age” column. Now it is much more readable!
Note
📎 If you want to know more about the custom properties, see the following documentation: Generate Custom Properties
Now, let’s create a transaction that will plan our journey.
Step 9 - Creating a transaction
General
We will use the Transaction feature. The transaction is a kind of function that can combine complex business logic. It can accept the parameters and return some results. In this document, we will create two transactions:
- BuildJourney - this transaction will generate a journey and book hotels. We will learn how to build complex logic and how to use the Model creation in practice.
- GenerateReport - this transaction will generate a report based on the upcoming journey. We will learn how to use the QuerySets, how to add to the application external python libraries.
The journey builder transaction
This transaction will generate a journey and book hotels. In the real world, it would generate it based on the trends or other criteria, although for simplification we will generate it just randomly.
So, this transaction will accept the following params:
- countries - list of possible countries we want to visit.
- nights - how many nights at each stay
- total_nights - how long the whole journey will take e
- persons - list of persons who will attend this journey
- equipment - key-value for storing some equipment and quantity for this journey
Let’s generate a transaction blueprint by running the following command:
!amsdal generate transaction BuildJourney
You are using amsdal_models version 0.7.0, however version 0.7.1 is available.
You should consider upgrading via the 'pip install --upgrade amsdal_models'
command.
It will create the src/transactions/build_journey.py file, let's change it to the following:
transaction = Path('./src/transactions/build_journey.py')
transaction.write_text('''
import random
from datetime import date, timedelta
from datetime import datetime

from amsdal.transactions import transaction
from models.booking import Booking
from models.country import Country
from models.journey import Journey
from models.person import Person
from models.property import Property


@transaction
def BuildJourney(
    countries: list[Country],
    nights: int,
    total_nights: int,
    persons: list[Person],
    equipment: dict[str, int],
):
    country = get_country_by_trend(countries)
    start_date = get_best_start_date(country)
    bookings = book_best_properties(country, start_date, nights, total_nights)
    last_booking = bookings[-1]
    end_date = datetime.strptime(last_booking.date, "%Y-%m-%d") + timedelta(
        days=last_booking.nights
    )
    journey_start_date = start_date.strftime("%Y-%m-%d")
    journey_end_date = end_date.strftime("%Y-%m-%d")

    journey = Journey(
        start_date=journey_start_date,
        end_date=journey_end_date,
        country=country,
        persons=persons,
        equipment=equipment,
        bookings=bookings,
    )
    journey.save()

    return {
        "start_date": journey.start_date,
    }


def get_country_by_trend(countries: list[Country]) -> Country:
    if len(countries) == 0:
        raise ValueError("No countries specified")

    # TODO: get the most trending country for the current year
    return random.choice(countries)


def get_best_start_date(country: Country) -> date:
    # TODO: here we can check a weather forecast for the country and find the best closest start date
    return date.today() + timedelta(days=random.randint(30, 45))


def book_best_properties(
    country: Country,
    start_date: date,
    nights: int,
    total_nights: int,
):
    # TODO: here we can use external API to find the best properties for the country and book the available ones
    bookings = []
    properties = Property.objects.all().execute()
    rest_nights = total_nights

    if len(properties) == 0:
        raise ValueError(
            f"No properties found for the country: {country.name}"
        )

    while len(properties) > 0 and rest_nights > 0:
        _property = random.choice(properties)
        properties.remove(_property)

        if not len(properties) or rest_nights <= 2 * nights:
            book_nights = rest_nights
            rest_nights = 0
        else:
            book_nights = nights
            rest_nights -= nights

        booking = Booking(
            property=_property,
            date=start_date.strftime("%Y-%m-%d"),
            nights=book_nights,
        )
        booking.save()
        bookings.append(booking)

    return bookings
''')
2683
Let’s see what we do there. First of all, the def BuildJourney(...) is our transaction, and as you can see it
accepts all arguments that we described before.
Note
⚠️ The important thing here is to annotate all arguments of transactions with types. It helps to properly understand and
accept them when you use API to execute these transactions (see POST to /transactions/{transactionname} in the
Swagger documentation).
All other functions (e.g. get_country_by_trend, get_best_start_date, etc.) are just helpers that we use inside our
transaction. You can put the whole logic just inside the BuildJourney function, although splitting it into smaller
functions provides a better understanding of the code.
The idea of this transaction is:
- it gets one of the passed countries, the most popular country for this year. Although for simplification we just take the country randomly.
- After that, we resolve the best start date of the journey. For example, we can check the weather forecast for resolved country and pick the warmest day. Although for simplification, we just take it randomly as well.
- Then we search the most popular properties for this country and for journey dates and book them. Again, we can use
some 3rd-party integration to find the best properties, although for simplification we just take them all from our
pre-defined database. Note, we loop through our properties and book one by one until we will book a number of nights
equal to provided
total_nightsargument. - And when we have a list of bookings, we create our Journey object and put there all referenced objects.
This transaction demonstrates how can we build the complex business logic and create records and store them in DB. As you can see, in order to create and store an object you need just create an instance of this object.
Note
📎 If you want to know more about object creation and updating see the following documentation: Model instances
Let’s now build one more transaction that will build a report.
Report generation transaction
Let’s build the transaction that will generate a report about the upcoming journey in HTML format, and also will include the history of any changes related to it.
Assume we want to generate the following layout for our HTML report:
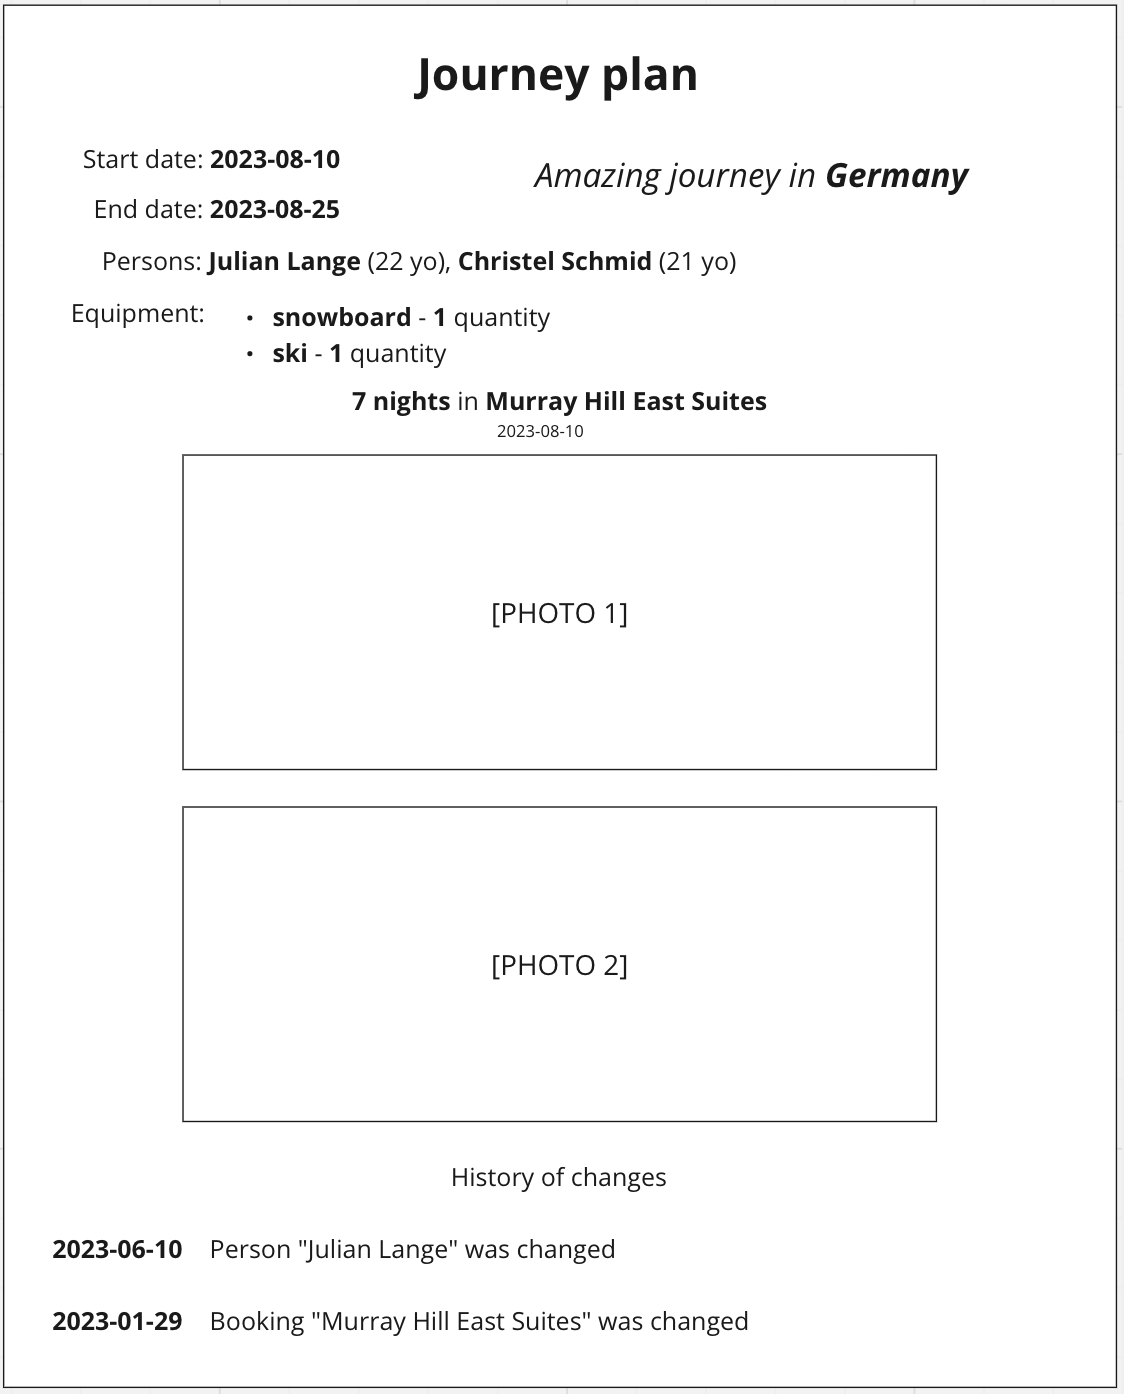
The business logic will be the following:
- Our transaction function will not accept arguments
- It will take the first upcoming journey and collect the stored information from DB
- Then we will put this information into an HTML template and render the HTML page
- After that, we will just write this HTML to a file system, although it can be sent via E-mail in the real-world project.
First of all, we need to extend our Journey model and add the start_timestamp field with the number type to have the
ability to filter and order our journeys easily. Open src/models/journey/model.json and add this property just next to
the start_date:
journey_model = Path('./src/models/journey/model.json')
journey_model.write_text('''
{
    "title": "Journey",
    "type": "object",
    "properties": {
        "start_date": {
            "title": "start_date",
            "type": "string"
        },
        "start_timestamp": {
            "title": "start_timestamp",
            "type": "number"
        },
        "end_date": {
            "title": "end_date",
            "type": "string"
        },
        "country": {
            "title": "country",
            "type": "Country"
        },
        "persons": {
            "title": "persons",
            "type": "array",
            "items": {
                "type": "Person"
            }
        },
        "equipment": {
            "title": "equipment",
            "type": "dictionary",
            "items": {
                "key": {
                    "type": "string"
                },
                "value": {
                    "type": "number"
                }
            }
        },
        "bookings": {
            "title": "bookings",
            "type": "array",
            "items": {
                "type": "Booking"
            }
        }
    },
    "required": [],
    "indexed": []
}
''')
1143
Now, let’s add functionality that will set this timestamp automatically based on the start_date value. We will do that
in post_init hook, so we need to run amsdal generate hook --model Journey post_init, and then put the functionality there:
!amsdal generate hook --model Journey post_init

post_init_hook = Path('./src/models/journey/hooks/post_init.py')
post_init_hook.write_text('''
def post_init(self, is_new_object, kwargs):
    from datetime import datetime

    try:
        start_date = datetime.strptime(self.start_date, "%Y-%m-%d")
    except (TypeError, ValueError):
        self.start_timestamp = None
    else:
        self.start_timestamp = start_date.timestamp()
''')
You are using amsdal_models version 0.7.0, however version 0.7.1 is available.
You should consider upgrading via the 'pip install --upgrade amsdal_models'
command.
293
This hook will be executed after the instance is initialized and validation was proceed, so we can access instance
properties via self.
After these changes, you need to make migrations:
!amsdal migrations new
!amsdal migrations apply
You are using amsdal_models version 0.7.0, however version 0.7.1 is available.
You should consider upgrading via the 'pip install --upgrade amsdal_models'
command.
Migration created: 0004_update_class_journey.py
You are using amsdal_models version 0.7.0, however version 0.7.1 is available.
You should consider upgrading via the 'pip install --upgrade amsdal_models'
command.
classes:37: UserWarning: `_non_empty_keys_properties` overrides an existing Pydantic `@field_validator` decorator
classes:51: UserWarning: `_non_empty_keys_items` overrides an existing Pydantic `@field_validator` decorator
classes:76: UserWarning: `_non_empty_keys_properties` overrides an existing Pydantic `@field_validator` decorator
classes:264: UserWarning: `_non_empty_keys_data` overrides an existing Pydantic `@field_validator` decorator
classes:284: UserWarning: `_non_empty_keys_items` overrides an existing Pydantic `@field_validator` decorator
classes:151: UserWarning: `_non_empty_keys_equipment` overrides an existing Pydantic `@field_validator` decorator
classes:41: UserWarning: `_non_empty_keys_equipment` overrides an existing Pydantic `@field_validator` decorator
classes:70: UserWarning: `_non_empty_keys_equipment` overrides an existing Pydantic `@field_validator` decorator
classes:42: UserWarning: `_non_empty_keys_equipment` overrides an existing Pydantic `@field_validator` decorator
Migrations applied
App:
  - [x] 0004_update_class_journey.py
Now, let’s run the following command to generate a new transaction blueprint:
!amsdal generate transaction GenerateReport
You are using amsdal_models version 0.7.0, however version 0.7.1 is available.
You should consider upgrading via the 'pip install --upgrade amsdal_models'
command.
And change the generated file to the following:
generate_report = Path('./src/transactions/generate_report.py')
generate_report.write_text('''
import base64
import jinja2
from datetime import datetime

from amsdal import Metadata
from amsdal import Versions
from amsdal import Reference
from amsdal.models import Model
from amsdal.transactions import transaction

from models.booking import Booking
from models.journey import Journey
from models.person import Person


@transaction
def GenerateReport():
    upcoming_journey = get_upcoming_journey()

    if not upcoming_journey:
        raise ValueError("No upcoming journey found")

    history_changes = get_history_changes(upcoming_journey)
    html_buffer = render_html(upcoming_journey, history_changes)

    # Send this HTML in E-mail, although we will just write to the file
    with open("report.html", "wt") as f:
        f.write(html_buffer)

    return {
        "html": html_buffer,
    }
''')
810
This is not yet ready for running because we need to implement each of these internal functions, although it gives us an understanding of the transaction business logic:
- So first of all, we need to get the upcoming journey from DB
upcoming_journey = get_upcoming_journey() - Then we check that we have a journey, otherwise, we raise the validation error
- After that, we get the history changes for this journey
history_changes = get_history_changes(upcoming_journey) - Then we render the HTML page
html_buffer = render_html(upcoming_journey, history_changes) - And finally, we write this HTML to the file system
Let’s start implementing the first inner function - get_upcoming_journey():
content = generate_report.read_text()
generate_report.write_text(content + '''
def get_upcoming_journey():
    qs = Journey.objects.filter(start_timestamp__gt=datetime.now().timestamp())
    qs = qs.order_by("start_timestamp")

    return qs.first().execute()
''')
992
We just put this function next to our GenerateReport() function as we did it in the previous transaction. As you can see,
we build a QuerySet and first of all filter Journeys that have start_timestamp greater than the current
timestamp.
After that, we add ordering to this QuerySet by qs.order_by("start_timestamp") which means we need to order our
records by the start_timestamp field in the ASC direction.
Each applied function to the QuerySet, e.g. filter, order_by, first, etc., will return a new QuerySet
object. So the QuerySet is a kind of immutable object, therefore we override the qs variable after applying the
ordering. The first will just take the first record from the ordered list.
Note
📎 If you want to know more about QuerySets, see the following documentation: QuerySets
OK, now let’s implement the next function - get_history_changes(upcoming_journey). This function should return the
list of changes, for example, in the following format:
[
    {"date": "2023-04-10", "model": "Person", "action": "changed", "display_name": "Julian Lange"},
    ...
]
So we later can render the list of changes in our PDF report. The implementation of this function can be the following:
content = generate_report.read_text()
generate_report.write_text(content + '''
def get_history_changes(journey: Journey):
    history = []

    # get all history changes for the journey itself
    history.extend(_get_history_changes_for_model(Journey, journey, "Journey"))

    # get all history changes for the bookings
    for booking in journey.bookings:
        history.extend(_get_history_changes_for_model(Booking, booking, "Booking"))

    # get all history changes for the persons
    for person in journey.persons:
        history.extend(_get_history_changes_for_model(Person, person, "Person"))

    # sort history by order_key
    history.sort(key=lambda x: x["order_key"])

    return history


def _get_history_changes_for_model(model, obj: Model | Reference, model_name):
    history = []

    qs = model.objects.filter(
        _address__class_version=Versions.ALL,
        _address__object_id=obj.object_id
        if isinstance(obj, Model)
        else obj.ref.object_id,
        _address__object_version_id=Versions.ALL,
    )

    item: Model
    for item in qs.execute():
        history.append(
            {
                "order_key": item.get_metadata().updated_at,
                "date": _ms_to_date(item.get_metadata().updated_at),
                "model": model_name,
                "action": _resolve_action(item.get_metadata()),
                "display_name": getattr(
                    item, "display_name", str(item.get_metadata().address)
                ),
            }
        )

    return history


def _ms_to_date(ms: int):
    return datetime.fromtimestamp(ms / 1000).strftime("%Y-%m-%d")


def _resolve_action(metadata: Metadata):
    if metadata.is_deleted:
        return "Deleted"
    elif metadata.next_version:
        return "Changed"
    else:
        return "Created"
''')
2736
As you can see we added a few more internal function-helpers just to get rid of code duplication.
Also, you can see we use the _address__class_version=Versions.ALL QuerySet filter in order to fetch all versions of
classes and the _address__object_version_id=Versions.ALL to fetch all versions of the object itself.
Now, let’s write the render_html(upcoming_journey, history_changes) function implementation. We will store the HTML
template separately as a static file. Therefore, let’s, first of all, create the directory static in the src one
and put there our template.html:
template_path = Path(notebook_dir) / 'template.html'

print('Template:')
print(template_path.read_text())

destination_file = working_directory / 'src/static/template.html'
destination_file.parent.mkdir(parents=True, exist_ok=True)
destination_file.write_text(template_path.read_text())
Template:
<!DOCTYPE html>
<html>
<head>
    <style>
        body {
            margin: 0;
            font-family: Arial, sans-serif;
            font-size: 12px;
            padding: 10px 20px;
        }

        h1 {
            text-align: center;
        }

        h3 {
            text-align: center;
            font-size: 14px;
            margin-left: 15px;
            margin-top: 35px;
        }

        .amazing-journey {
            flex-grow: 1;
            text-align: right;
        }

        .rows {
            flex-direction: row;
            display: flex;
        }

        .text {
            margin: 15px 5px;
        }

        .text > div {
            margin: 8px 0;
        }

        ul {
            padding-left: 10px;
            margin-top: 0;
        }

        .sub-header {
            text-align: center;
            margin: -10px 0 10px;
        }

        img {
            display: block;
            margin: 5px auto;
        }
    </style>
</head>
<body>
<h1>Journey plan</h1>
<br/>
<div class="rows">
    <div class="rows">
        <div class="text">
            <div>Start date:</div>
            <div>End date:</div>
        </div>
        <div class="text">
            <div><strong>{{journey.start_date}}</strong></div>
            <div><strong>{{journey.end_date}}</strong></div>
        </div>
    </div>
    <h3 class="amazing-journey">
        Amazing journey in <strong>{{ journey.country.display_name }}</strong>
    </h3>
</div>
<div class="rows">
    <div class="text">
        <div>Persons:</div>
        <div>Equipment:</div>
    </div>
    <div class="text">
        <div>
            {% for person in journey.persons %}
            <strong>{{ person.first_name }} {{ person.last_name}}</strong> ({{ person.age }} yo){% if not
            loop.last %}, {% endif %}
            {% endfor %}
        </div>
        <div>
            <ul>
                {% for equipment, quantity in journey.equipment | items %}
                <li><strong>{{ equipment }}</strong> - <strong>{{ quantity }}</strong> quantity</li>
                {% endfor %}
            </ul>
        </div>
    </div>
</div>
{% for booking in journey.bookings %}
<div class="section">
    <h3 class="property">
        <strong>{{ booking.nights|int }} nights</strong> in <strong>{{ booking.property.name }}</strong>
    </h3>
    <div class="sub-header">{{ booking.date }}</div>
    {% for photo in booking.property.photos %}
    <img src="{{ photo.data | base64 }}" height="200px"/>
    {% endfor %}
</div>
{% endfor %}
<div class="history">
    <h3>History of changes</h3>
    {% for item in history_changes %}
    <div class="rows">
        <div class="text">
            <strong>{{ item.date }}</strong>
        </div>
        <div class="text">
            {{ item.model }} "{{ item.display_name | default('N/A', true) }}" was {{ item.action }}.
        </div>
    </div>
    {% endfor %}
</div>
</body>
</html>
2933
In order to render this template we will use the Jinja2 Python
library. So we need to add this package to our project and install it. Add the following line
(just below of amsdal[cli]) into the requirements.txt file located in the root of our project:
requirements = Path('./requirements.txt')
requirements_text = requirements.read_text()
requirements.write_text(requirements_text + '\njinja2')

!pip install -r requirements.txt
Note, it’s important to have the exact requirements.txt file name for all our dependencies, so do not rename it.
Ok, now let’s implement our render_html(upcoming_journey, history_changes) function (just add it at the bottom of
the src/transactions/generate_report.py file):
content = generate_report.read_text()
generate_report.write_text(content + '''
def render_html(journey: Journey, history_changes: list):
    loader = jinja2.FileSystemLoader(searchpath="./static")
    env = jinja2.Environment(loader=loader, extensions=["jinja2.ext.loopcontrols"])

    def base64_encode(value):
        if not isinstance(value, bytes):
            raise TypeError("Input must be bytes")

        result = base64.b64encode(value).decode("utf-8")

        return f"data:image/jpeg;base64,{result}"

    env.filters["base64"] = base64_encode

    template = env.get_template("template.html")

    return template.render(
        journey=journey.model_dump(),
        history_changes=history_changes,
    )
''')
3378
As you can see, here we just initiate Jinja2 classes specifies searchpath="./static" where our template is located,
and render the template by passing there two variables - journey and history_changes. We also add a custom Jinja2
filter - base64 just in order to display the image in HTML <img src="..."/> tag. As you can see, images are stored
in base64 as bytes, so we just decode them to string value.decode("utf-8") and build the
string f"data:image/jpeg;base64,{result}" that we put to the IMG tag.
Done! Let's check the whole src/transactions/generate_report.py:
!cat ./src/transactions/generate_report.py
import base64
import jinja2
from datetime import datetime

from amsdal import Metadata
from amsdal import Versions
from amsdal import Reference
from amsdal.models import Model
from amsdal.transactions import transaction

from models.booking import Booking
from models.journey import Journey
from models.person import Person


@transaction
def GenerateReport():
    upcoming_journey = get_upcoming_journey()

    if not upcoming_journey:
        raise ValueError("No upcoming journey found")

    history_changes = get_history_changes(upcoming_journey)
    html_buffer = render_html(upcoming_journey, history_changes)

    # Send this HTML in E-mail, although we will just write to the file
    with open("report.html", "wt") as f:
        f.write(html_buffer)

    return {
        "html": html_buffer,
    }

def get_upcoming_journey():
    qs = Journey.objects.filter(start_timestamp__gt=datetime.now().timestamp())
    qs = qs.order_by("start_timestamp")

    return qs.first().execute()

def get_history_changes(journey: Journey):
    history = []

    # get all history changes for the journey itself
    history.extend(_get_history_changes_for_model(Journey, journey, "Journey"))

    # get all history changes for the bookings
    for booking in journey.bookings:
        history.extend(_get_history_changes_for_model(Booking, booking, "Booking"))

    # get all history changes for the persons
    for person in journey.persons:
        history.extend(_get_history_changes_for_model(Person, person, "Person"))

    # sort history by order_key
    history.sort(key=lambda x: x["order_key"])

    return history


def _get_history_changes_for_model(model, obj: Model | Reference, model_name):
    history = []

    qs = model.objects.filter(
        _address__class_version=Versions.ALL,
        _address__object_id=obj.object_id
        if isinstance(obj, Model)
        else obj.ref.object_id,
        _address__object_version_id=Versions.ALL,
    )

    item: Model
    for item in qs.execute():
        history.append(
            {
                "order_key": item.get_metadata().updated_at,
                "date": _ms_to_date(item.get_metadata().updated_at),
                "model": model_name,
                "action": _resolve_action(item.get_metadata()),
                "display_name": getattr(
                    item, "display_name", str(item.get_metadata().address)
                ),
            }
        )

    return history


def _ms_to_date(ms: int):
    return datetime.fromtimestamp(ms / 1000).strftime("%Y-%m-%d")


def _resolve_action(metadata: Metadata):
    if metadata.is_deleted:
        return "Deleted"
    elif metadata.next_version:
        return "Changed"
    else:
        return "Created"

def render_html(journey: Journey, history_changes: list):
    loader = jinja2.FileSystemLoader(searchpath="./static")
    env = jinja2.Environment(loader=loader, extensions=["jinja2.ext.loopcontrols"])

    def base64_encode(value):
        if not isinstance(value, bytes):
            raise TypeError("Input must be bytes")

        result = base64.b64encode(value).decode("utf-8")

        return f"data:image/jpeg;base64,{result}"

    env.filters["base64"] = base64_encode

    template = env.get_template("template.html")

    return template.render(
        journey=journey.model_dump(),
        history_changes=history_changes,
    )
Let’s run our local server and check it - amsdal serve
- Go to the list of persons and create a Person with an age greater than 18.
- Now go to transactions and execute the
BuildJourneytransaction. - After that go and run our
GenerateReporttransaction.
- Use the
Object CreateAPI to create a Person with an age greater than 18 (see examples above). - Go to the Transaction Execute API
click on
Try it out, put theBuildJourneyintotransaction_namefield and the following JSON as request body:Replace{ "countries": [ { "ref": COUNTRY_ADDRESS } ], "nights": 7, "total_nights": 15, "persons": [ { "ref": PERSON_ADDRESS } ], "equipment": { "ski": 1, "ski pass": 2 } }COUNTRY_ADDRESSandPERSON_ADDRESSwith actual addresses and hitExecute. You should get a200status code andstart_datein JSON response. - Now, let's execute the second transaction, change the
transaction_nametoGenerateReport. This transaction doesn't accept any arguments so put{}as a request body, hit theExecute. You will get a200status code and HTML source of generated report.
Now, check the root directory of your project, you should see the report.html file. Try to open it in a browser
you should see something like this:
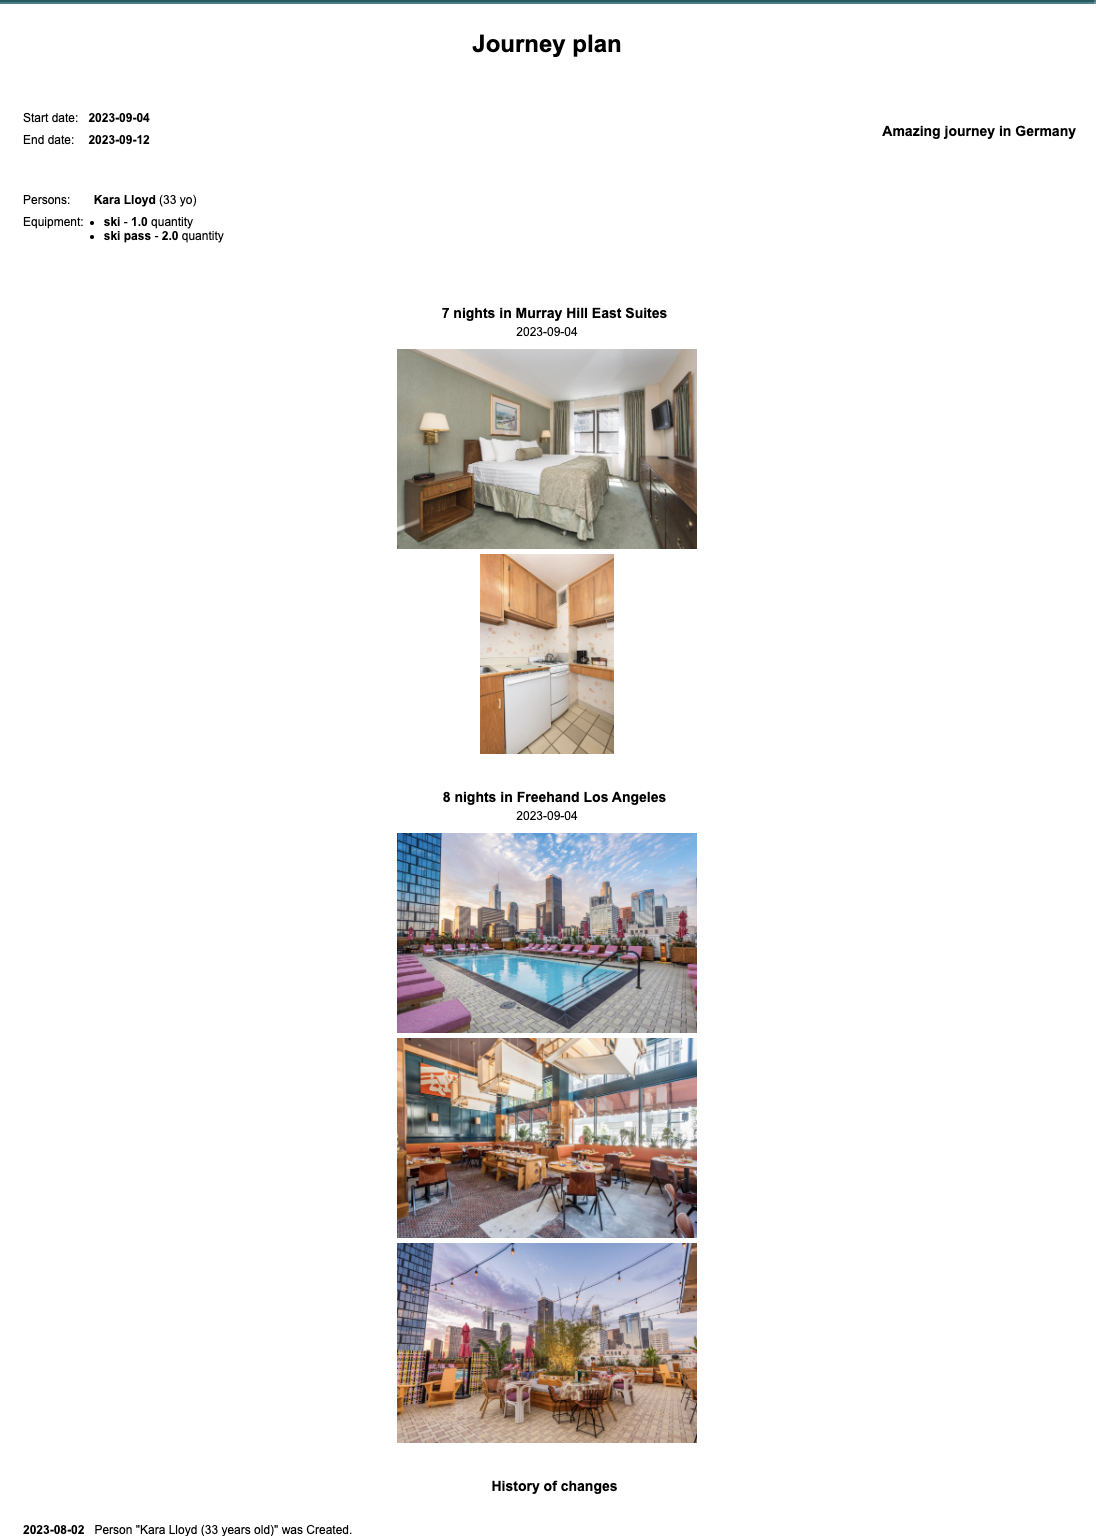
Now you know how to add 3rd party libraries to the AMSDAL application, add static files, and use the QuerySet to get historical data.
Step 10 - Deploy to cloud
Once you have completed the sign-up flow, you are able to deploy your application to AMSDAL Cloud. In order to deploy it just run the following command from the root directory of your application and follow the instructions:
!amsdal cloud deploys new --no-input
You are using amsdal_models version 0.7.0, however version 0.7.1 is available.
You should consider upgrading via the 'pip install --upgrade amsdal_models'
command.
Deploying to environment: main
Deploy is in progress now. After a few minutes, you can check the status of your deploy.
Your API domain: https://main-a58932e6f997427cb831ce9ef263e002.cloud.amsdal.com/
Just after that you will get the URL of your future app, and the deploying process will be run.
The URL will be something like:
https://main-1265b57653fd458ebdde6ffba78d3b8d.cloud.amsdal.com
The swagger documentation will be accessible by /docs path,
e.g. https://main-1265b57653fd458ebdde6ffba78d3b8d.cloud.amsdal.com/docs
In order to check the status of the deploying use the following command:
!amsdal cloud deploys --current-only
You are using amsdal_models version 0.7.0, however version 0.7.1 is available.
You should consider upgrading via the 'pip install --upgrade amsdal_models'
command.
┏━━━━━━━━━━━━┳━━━━━━━━━━━━━┳━━━━━━━━━━━┳━━━━━━━━━━━━┳━━━━━━━━━━━━━┳━━━━━━━━━━━━┓
┃            ┃             ┃           ┃ Applicati… ┃             ┃    Last    ┃
┃ Deploy ID  ┃ Environment ┃  Status   ┃    Name    ┃ Created At  ┃ Update At  ┃
┡━━━━━━━━━━━━╇━━━━━━━━━━━━━╇━━━━━━━━━━━╇━━━━━━━━━━━━╇━━━━━━━━━━━━━╇━━━━━━━━━━━━┩
│ da7a5f83f… │    main     │ deploying │ TravelApp  │ 2026-03-09  │ 2026-03-18 │
│            │             │           │            │  18:11:33   │  16:00:08  │
│            │             │           │            │     UTC     │    UTC     │
└────────────┴─────────────┴───────────┴────────────┴─────────────┴────────────┘
As soon as status will be changed from deploying to deployed you can use the URL of your app to access it.
Although, sometimes it can still return 503 HTTP status, that means deploying was complete although
the server is still booting. So you need just to wait a bit.
Note
See details about the amsdal cloud deploys command here: AMSDAL CLI - deploy